Mail Setup for Amazon Fire 7
This tutorial was created using an Amazon Fire 7. The pictures shown below may not coincide with your specific Amazon Kindle, the email client you are configuring, or the device you have. That said, the configuration information provided should be applicable to most Amazon Kindle devices and mail apps.
IMAP Mail Setup
- Click on the “Mail” icon
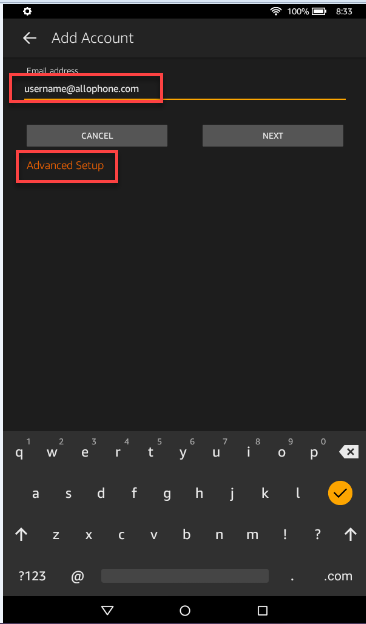
- Enter your full email address and click on “Advanced Setup”
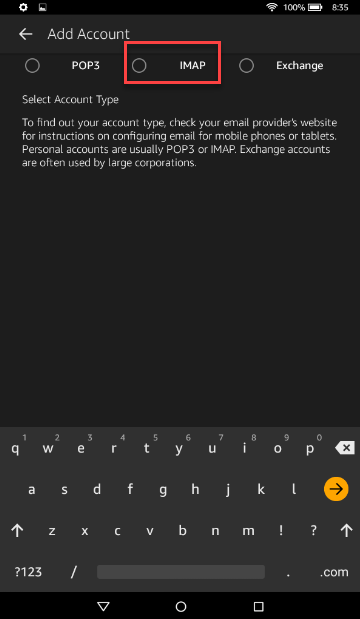
- Select “IMAP”
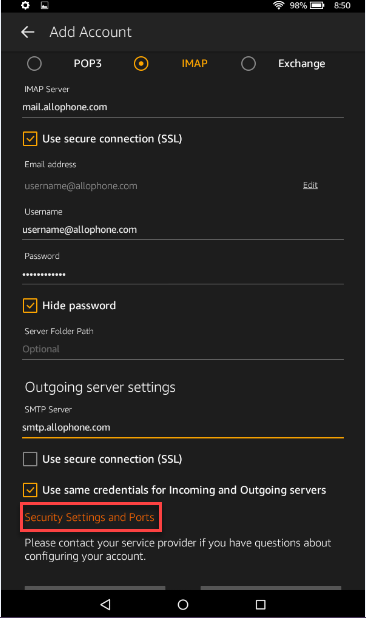
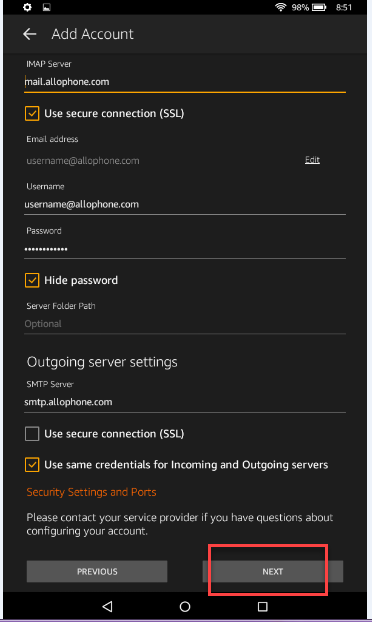
- On the next screen fill out the information as shown:
- IMAP Server : mail.allophone.com
- Check “use secure connection (SSL)”
- Username: enter your full email address
- Password: enter the password for your email account
- Outgoing server: smtp.allophone.com
- Check “Use same credentials for Incoming and Outgoing servers”
- Click on “Security Settings and Ports”
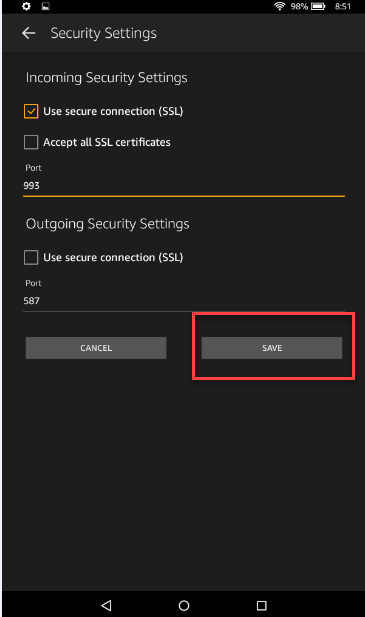
- On this screen, change settings as follows:
- Incoming Security Settings – Use secure connection (SSL) needs checked and the port needs to be set at “993”
- Outgoing Security Settings – Use secure connection (SSL) is unchecked and the port needs to be set at “587”.
- Click “Save”
- You will be taken back to the server screen. Click “Next” to verify your email settings.
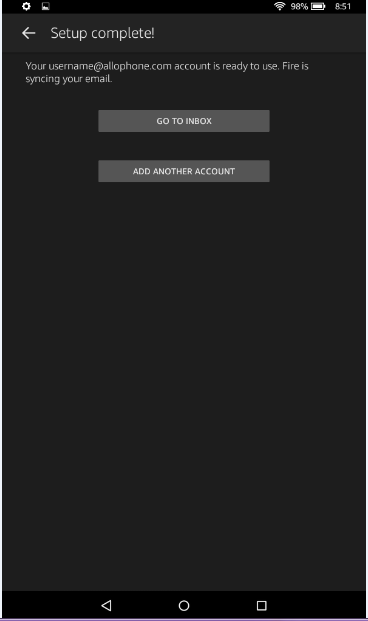
- If you have entered all of the information correctly, you will see this screen and your email is now set up and ready for use on your Fire 7.